7 Tips to Take Better Food Photography
April 13, 2017There’s no resisting the siren song of Instagram. She calls to us beguilingly, begging us to immortalise our delicious food in her illustrious halls forever. Only a fool would dare deny her.
Which is why it’s so heartbreaking when the incredible experience you’re having doesn’t translate to screen. But we get it. Your smashed avo and cabonara and molten chocolate lava cake deserve better. That’s why we asked our favourite Instagrammers, food bloggers and photographers for their top tips on how to take better photos of your food.
1. Choose the Light
Penelope at foodandbeveridge.com explains the importance of light in snapping your food. “The best light for food is natural light. Try and set up table top where there is soft gentle light, near a window either at your 10 o’clock or 2 o’clock. When window light comes from the 10 or 2 o’clock direction this bring out the beautiful textures in the food, backgrounds look more interesting, light illuminates through leafy greens, leaves and the food looks more alive. You should try and avoid ugly flat lighting which happens when all the light comes from the front of the dish. When using the 10 or 2 o’clock lighting method, you need to bounce a little light onto the front of the food, a white board, reflector or even a mirror. This bounced can be used to add a little extra light onto the front of the dish without being too harsh. Harsh light can create heavy dark shadows and best to be avoided. You can control where the amount of light that hits your food by moving the reflector’s angle. This will soften the shadows too. Using this technique of lighting you can shoot your food at 45-degree angle from the table or directly above.”
Michael Shen is equally as convinced about the importance of good old sun: “The literal meaning of the word ‘photography’ is ‘painting with light’. It makes sense then that the quality of your photo will only be as good as the quality of the light in the scene. So what’s best? A good bet is soft, natural light. Do you know how to spot a seasoned food photographer? I bet you’ll find them at the window seats – bathed in those lovely window-filtered rays. Try to avoid any harsh lighting on your food, which would cause sharp and distracting shadows, and create an overly-contrasty look. The unfiltered sun is an example of bad lighting. An overcast day, where the sunlight has been diffused by clouds is a photographer’s dream.
Personally, I shoot with natural light pretty much 100% of the time. Yep, you read that right: no flashes, no phone LEDs (I hate those), nadda. Understandably, you won’t always be able to get the best light – so try and shoot during the day if possible, and arrive at restaurants early so you can nab the window tables!”
2. Give it the Props it Deserves
Jane Collins, food stylist, explains the importance of props. “Props need to compliment the shot and space and not be there just for filling a gap! Of course use vessels to hold the food, I like to add add different textures, and heights, and tones to the image. This will create depth and an interesting layer to the composition of the shot, adding to the feel or the story behind the image. Bringing a softness to the shot in the way of napery is something I love to work with. Simple linen with texture and open weave will always add warmth and a friendly feeling.”
3. Avoid Being Direct
Lauren Bamford reminds us that where light comes from matters! “If you can control it, have your light source coming from any direction except overhead. Side lighting and back lighting always look better, as it creates complimentary shadows, and again enhances the deliciousness.”
4. Don’t Worry, Be Appy
Sara McCleary of Belly Rumbles lays it out for us: “A fundamental of photography and it doesn’t matter if you are taking a pic with an expensive DSLR or your smart phone. Crappy lighting will result in a crappy food photo. If you can’t avoid bad lighting, then edit your photos in one of the many smart phone apps available. You can bump up the brightness, clarity and colour.” So don’t feel guilty about reaching for that little extra help!
5. Coin up!
Lauren Bamford says: “When shooting from directly overhead (a very popular style), the perspective of a camera lens can warp any glasses or bottles you might have placed in the outer frame of the shot, making them look like they are falling over. A thoughtfully placed coin or two under the edge of the object easily corrects the distortion.”
6. Time’s a Ticking
Michael Shen of I’m Still Hungry explains “Ice creams melt. Pastas become limp. Soup becomes cold and loses its heartiness. You begin to lose friends by being that person that takes five minutes to take a photo of every single dish. Don’t be that person. Be quick, be efficient, and your food photos will actually be the better for it (plus, you keep your friends!). My best tip for you here is to pre-visualise the shot you’re going to be taking. Chances are, you probably already know the look of the dish you want to photograph from previous research. Consider how you’ll take the shot long before you actually take it – planning does it!”
7. Do You!
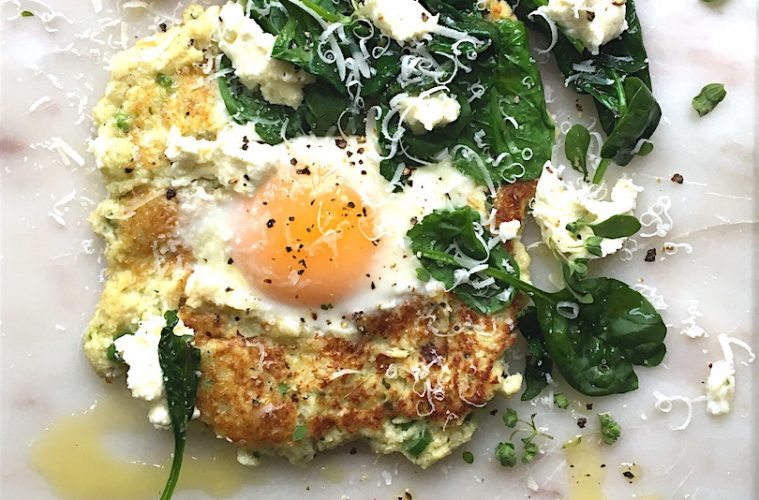
Recipe, styling and photography Jane Collins
Jane Collins leaves us with the most important tip when it comes to food photography skills. “Choose a style that suits you and run with it. Make your own style. Use others as inspiration and reference, but create your own look. Its will be easy to inject your own style into a shot instead of trying to capture someone else’s.” Hear Hear!






Really no matter if someone doesn’t understand then its up to other visitors that they will assist,
so here it takes place.
Great info & techniques. They will really help me in getting the best out of my shots. Cheers! 🙂 Caz.